How to create bulk email signatures easy and fast?

A professionally designed email signature definitely brands your daily business communication without the need of extra effort and time. The AdSigner provides an ultimate solution for IT managers of large companies reducing their time and workload when creating and sending email signatures for all employees.
Creating and filling out signatures one by one may prove very time-consuming for a large number of employees. With AdSigner’s user-friendly platform, you can create signatures in bulk fast and easy by importing a CSV file that contains all employees’ data. Let’s learn how to create complete signatures directly from an employee spreadsheet with AdSigner.
Step 1:
Prepare employee data in a CSV file
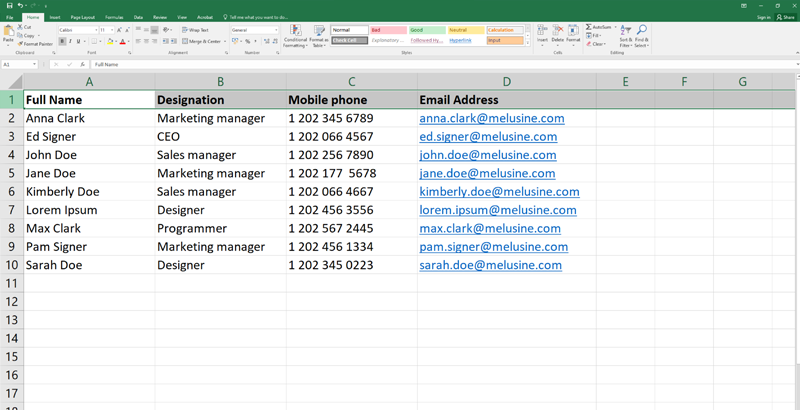
Before importing employee contacts, get the employee spreadsheet from HR and organize your employee data in a CSV file.
Don’t know what CSV is? CSV (Comma-Separated Values) is a simple file that stores spreadsheet information. You can save your spreadsheet as a CSV file in Microsoft Office Excel, Open/Neo Office Spreadsheets, Google Docs, Apple iWork Numbers and so on.
The first row of the CSV file should be a header, containing the name of each information type (e.g. Full name, Designation, email address, etc.), and the subsequent rows containing the employee information.
Step 2:
Import employee contacts to signature
Note: In order to make use of the bulk signature creation, you must first have a signature template created. If you haven’t created a template yet, do so before proceeding. You can learn more about how to create and edit templates here, or you can watch the video tutorial.
After you have created the template, proceed to Create signature and select import from CSV. Upload your prepared employee data CSV file.
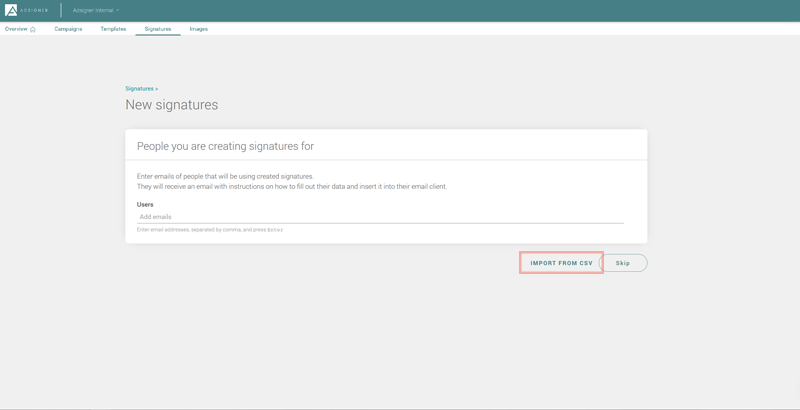
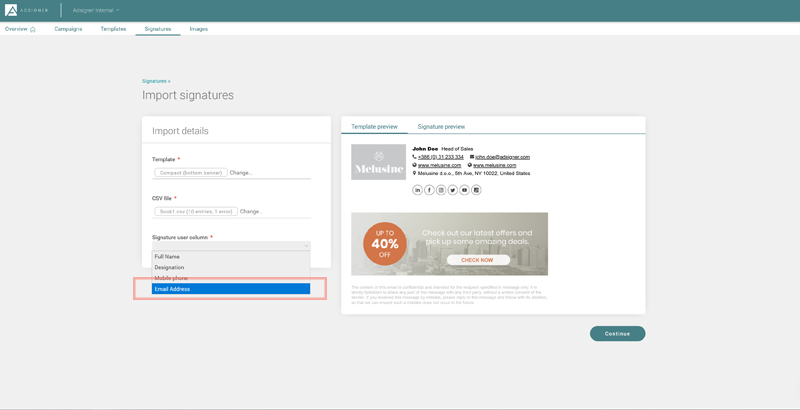
Make sure you select the name of the column from which the email addresses should be drawn in the Signature user column, and click Continue.
Step 3:
Fill in personal data fields
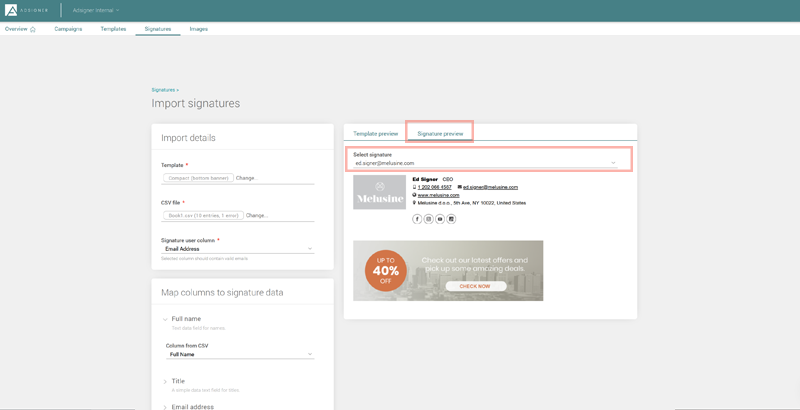
The CSV feature not only makes it easier for you to enter email addresses to send signature invitations, it also allows you to automatically fill each individual employee’s personal information. Simply click the drop-down arrow on each field and select the desired CSV column to the appropriate information field.
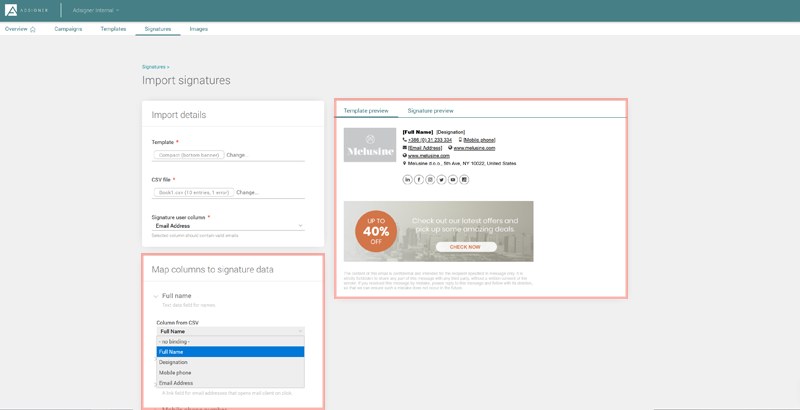
Once you have organized the information fields with the employee spreadsheet, you can preview the signature of individual employees for a final check-up. Select the signature preview and choose an email address from Select Signatures. You will see the complete signature with all the personal details of the employee filled.
Step 4:
Send signature invitation with insert instructions
Once the signatures are ready, click Continue and the CSV import process is complete. You can choose which employees shall and shall not receive the signature by ticking and unticking the checkmark on the left of each email address.
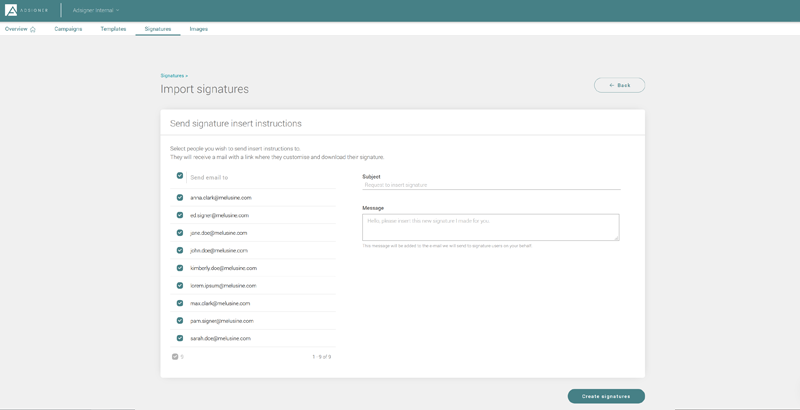
Click Create signatures to bulk invite all the employees with instructions on how to insert their signature.
That’s it. You’re ready to brand your daily business communication with the powerful advertising tool and let each of your employees sell, cross-sell and up-sell with every sent email, regardless of the number.


